2017-2024 Kawasaki Z650, Z650RS, and Ninja 650
Installation Instructions with customer installation video at bottom of page. Please note that the installation video should be used only to get a general idea of what the installation process entails and should not supersede our written instructions below.
WARNING: The installation of all parts in these installation instructions must be performed by a qualified motorcycle mechanic who is using the correct tools and who understands the correct use of all tools required to complete the installation.
Frame Sliders
Tools needed:
Torque wrench
Ratchet
Extension
14mm socket
8mm Allen drive socket
Fork Sliders (bottom of page)
Tools needed:
5mm Allen wrench
Swingarm Spools (includes special advisory)
Tools needed:
6mm Allen wrench
Frame Sliders
Important things to understand: The right and left frame sliders/hardware are not identical for this model. This means that when you remove the packaging you will be holding two frame sliders and mounting bolts that are different lengths and designs. Since we do not use generic pictures of frame sliders for any model listed on our site, if you suspect you have been sent the incorrect parts, you can compare the parts you have to the pictures listed for your specific model bike.
Loosen only one side at a time.
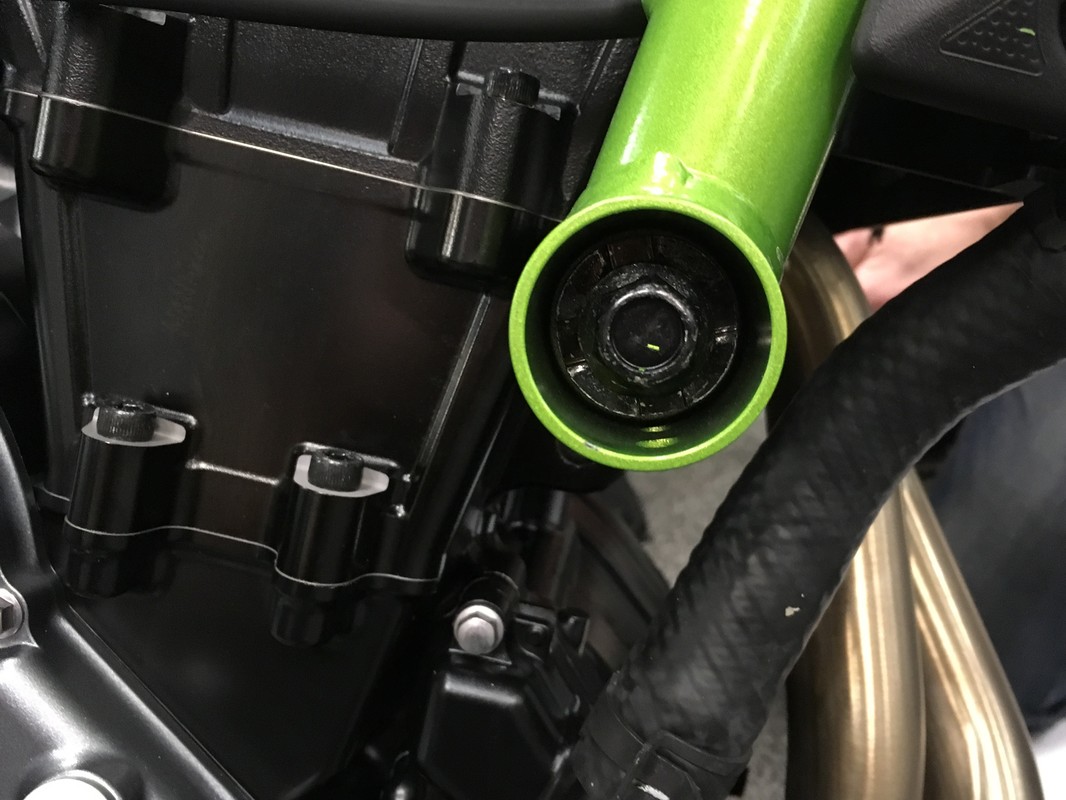
1. Start on the right side of the bike by loosening the engine mount bolt with the 14mm socket/extension and ratchet.
The mounting point is circled in red in figure A and also shown in figure D.
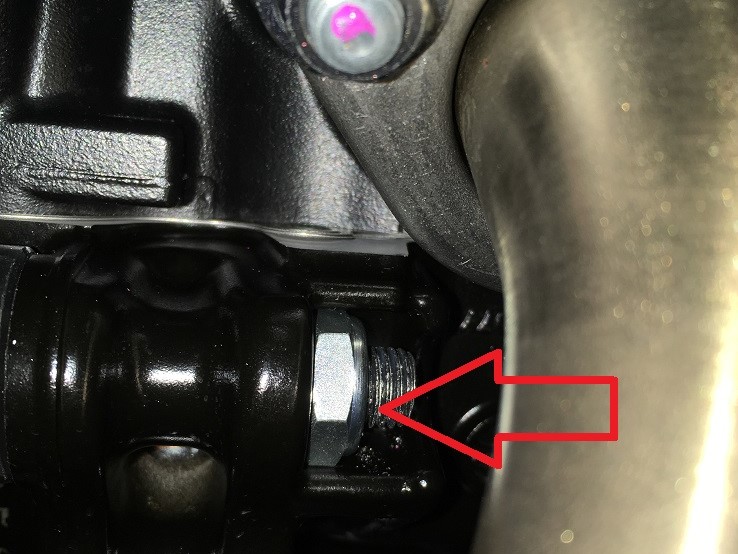
Both engine mounts use a nut on the inboard side of the mount (arrow point in figure C).
The nut is held in place by the mount so the nut does not need to be held by a wrench when removing the mount bolt.
2. Remove the bolt completely after loosened. The bolt may need a slight pull to come completely out of the mount.
Caution: Do not loosen the frame adjuster beneath the factory engine mount bolt. It is a large castle style nut and should not be changed in any way.
3. Remove the nut pictured in figure C.
The factory nut and bolt will not be used with the frame sliders but should be retained for possible use in the future if the frame sliders are ever removed.
4. Install the supplied nut in the cavity where the factory nut was removed.
WARNING: THE WASHER MUST BE ON THE SCREW BEFORE INSTALLING THE SLIDERS
5. Insert the bolt through the shortest of the two frame sliders and push through the mount (where the factory bolt was just removed) until the bolt contacts the nut. The nut may need to be held in place so the bolt does not push it from the cavity but once the threads engage the nut will not twist.
6. Use the 8mm Allen driver to tighten the frame slider bolt. The bolt should only require a small amount of force until the threads contact the locking portion of the nut.
7. Using a torque wrench, torque the bolt 32 lb/ft., which is the torque value specified in the factory service manual for these engine mount bolts. It is normal for the frame slider to twist on its spacer.
Left Side
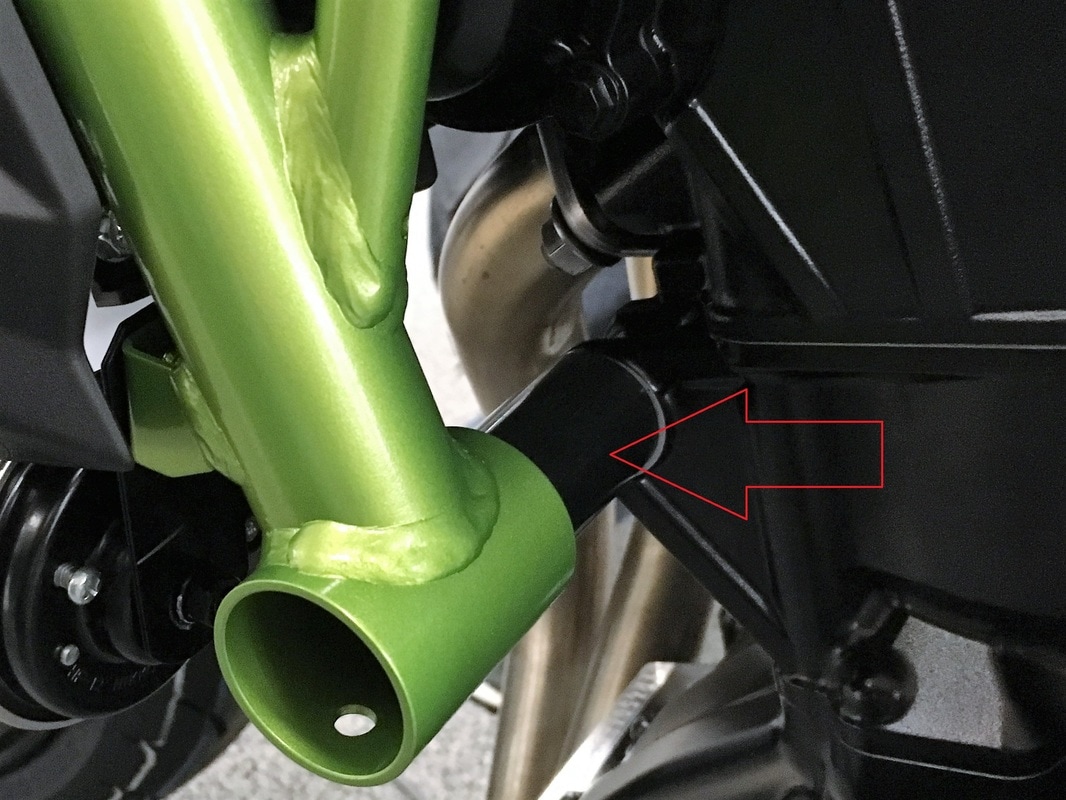
The left side uses a spacer between the frame and engine (figure E). When the engine mount bolt is removed the spacer may either shift out of place or fall out completely. It is very important that the spacer remains in the factory position and is not omitted.
Use the same tightening procedure for the left side (figure B) with the longer frame slider and shorter bolt.
A single frame slider can be purchased on the website if a crash or drop occurs.
Contact us with any installation questions.
Fork Sliders
Note: This set is installed with the front axle in its normal operating position.
1. Apply high strength (red) threadlocker compound to a mounting screw (w/washer) and attach the slider with the smaller diameter base to the rod.
2. Insert slider and shaft assembly into the left side of the axle.
3. Apply medium threadlocker (blue) compound to the remaining screw and insert through the remaining slider. While holding the opposing slider/shaft firmly in place by hand, insert the slider/screw into the axle and carefully start the screw into the shaft. It may take some careful positioning of the shaft to get the threads started into the shaft.
4. Once the screw has been started and confirmed that proper thread engagement was made, lightly torque the screw.
Swingarm Spools
Special advisory:
Due to the location of the factory exhaust, specifically the position of the exhaust outlet, the swingarm spools cannot be used on the bike while riding. The spools should be used during maintenance only (wheel removal, chain maintenance, bike parking/storage, etc.) Use of the spools while riding will cause melting and deformation of the right side spool due to heat directed from the exhaust system.
An exception to this requirement is in a case where a Ninja 650 or Z650 has an aftermarket exhaust that does not direct concentrated exhaust gas onto the spool in the same way as the factory exhaust system.
When using the swingarm spools, apply a small amount of grease or oil to the threads of the mounting screws and tighten with light to medium torque.
