2022-2023 GSX-S1000 GT Frame Sliders Installation
WARNING: The installation of all parts in these installation instructions must be performed by a qualified motorcycle mechanic who is using the correct tools and who understands the correct use of all tools required to complete the installation.
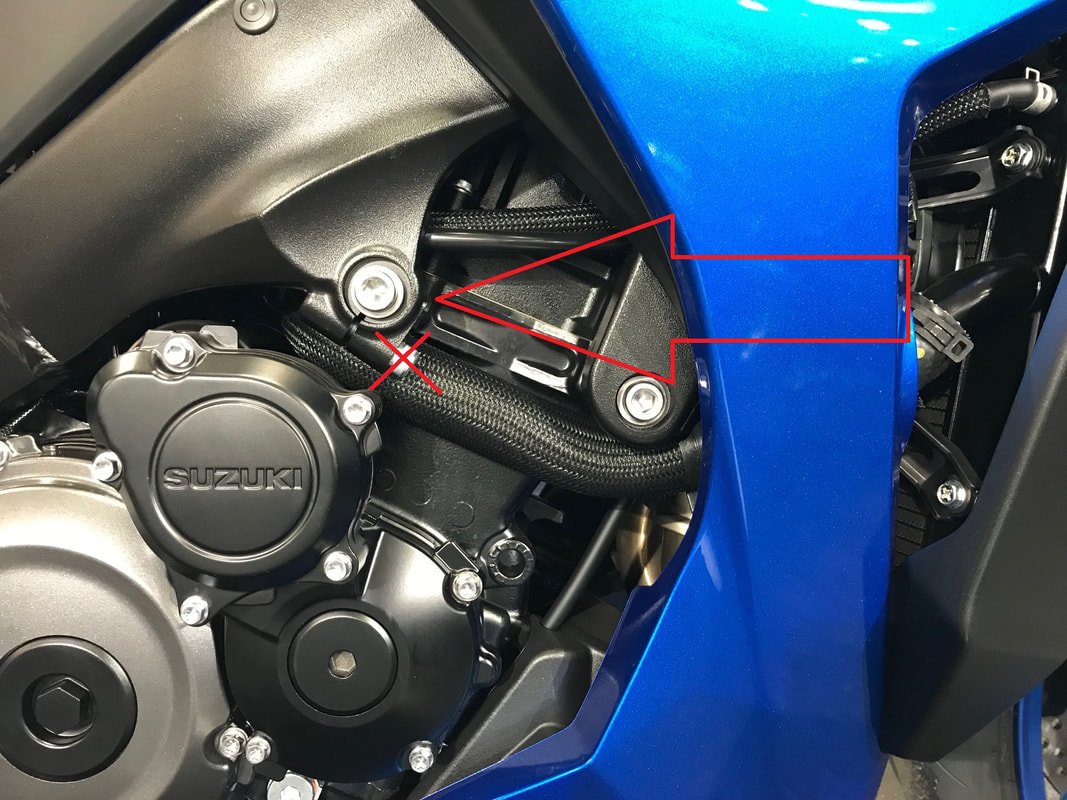
1. Start on the right side of the bike (do not loosen both sides at once) by removing the engine mount
bolt. This is the bolt that goes through the frame and into the side of the engine. (end of arrow in photo)
DO NOT LOOSEN/REMOVE THE BOLT WITH THE X ON IT IN PHOTO
2. Identify the right slider- it is the slider with the shorter base. Install the frame slider. WARNING: THE WASHER MUST BE ON THE SCREW BEFORE INSTALLING THE SLIDERS
3. Do not use an air-powered impact wrench to install the slider bolt. Using a torque wrench, tighten to
the factory torque specification (same as factory screw).
4. Make sure the right side is tight before starting on the left side.
5. For the left side, use the same procedure- remove the engine mount bolt and install the
frame slider with the longer base using a torque wrench and factory specified amount of torque (same as factory screw).
If one side is damaged in a crash or drop, we offer single side replacements, instead of buying a complete set.
WARNING: The installation of all parts in these installation instructions must be performed by a qualified motorcycle mechanic who is using the correct tools and who understands the correct use of all tools required to complete the installation.
1. Start on the right side of the bike (do not loosen both sides at once) by removing the engine mount
bolt. This is the bolt that goes through the frame and into the side of the engine. (end of arrow in photo)
DO NOT LOOSEN/REMOVE THE BOLT WITH THE X ON IT IN PHOTO
2. Identify the right slider- it is the slider with the shorter base. Install the frame slider. WARNING: THE WASHER MUST BE ON THE SCREW BEFORE INSTALLING THE SLIDERS
3. Do not use an air-powered impact wrench to install the slider bolt. Using a torque wrench, tighten to
the factory torque specification (same as factory screw).
4. Make sure the right side is tight before starting on the left side.
5. For the left side, use the same procedure- remove the engine mount bolt and install the
frame slider with the longer base using a torque wrench and factory specified amount of torque (same as factory screw).
If one side is damaged in a crash or drop, we offer single side replacements, instead of buying a complete set.