
Fig A
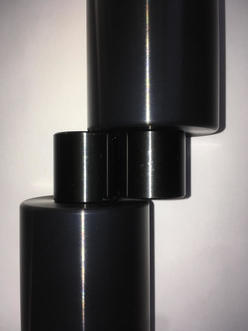
Fig C
|

Fig B
|
2017-2020 Yamaha FZ-09 MT-09 Frame Sliders/Fork Sliders/Swingarm Spools/Rear Axle Sliders Installation
Instructions
WARNING: The installation of all parts in these installation instructions must be performed by a qualified motorcycle mechanic who is using the correct tools and who understands the correct use of all tools required to complete the installation.
Front Frame Sliders:
Tools needed-
- 3/8 drive ratchet
- Short 3/8 extension
- 8mm socket head (Allen) driver
- Torque wrench
Notes:
- It's best to work on only one side at a time
- Side is as viewed while sitting on the bike so right is throttle side and left is clutch lever
side.
- The front left slider is longer than the right side slider.
1. Start on the right side by removing the factory engine mount screw circled in red (fig A).
2. Put the screw and washer through the shorter frame slider and position the notch to clear the plastic trim piece near the mounting point.
3. Thread the screw into the engine mount and tighten while holding the slider in the correct position. Tighten the screw to the factory torque specification (same as factory screw).
4. Repeat the same steps on the opposite side with the other frame slider.
Rear Frame Sliders:
The rear frame sliders are both the same length but the right slider has a slightly longer
base (smaller diameter section). The two can be compared, as in figure C, to determine the sizes since the difference is subtle.
1. Start on the right side by removing the factory engine mount screw circled in red (fig B).
2. Put the screw/washer through the frame slider with the longer base.
3. Thread the screw into the engine mount and tighten the screw to the factory torque specification (same as factory screw).
4. Repeat the same steps on the opposite side with the other frame slider.
FZ-09 Fork Sliders Installation
(CAUTION!!! TOO MUCH TORQUE IN THE FORK SLIDERS ROD WILL
CAUSE THE THREADS TO STRIP AND A NEW ROD WILL NEED TO BE
PURCHASED).
Items needed:
- 5mm Hex/Allen wrench (2)
- Blue thread locker (Loctite)
- Red thread locker (Loctite)
1. Apply a small amount of red thread locker to the screw threads of the shortest
screw (40mm) that was supplied with the fork sliders set.
2. Attach the slider with the extended base to the aluminum fork slider rod.
3. After tightening, insert rod/slider assembly into the left side of the axle. The
slider base should fit into the hex that would normally be used to
loosen/tighten the axle.
4. Apply blue thread locker to the longer screw in the set (60mm, the only one left)
and install the slider with the recessed base onto the right side fork. It may take a second
to find the rod in the axle and get the threads started but just be sure the screw
starts straight.
5. Hold the screw on the opposite side with another 5mm hex wrench and tighten
the right side with a small amount of torque. CAUTION!!!! The threads in the rod
will strip if too much force is applied to the screws when tightening.
The fork slider assembly should not have any lateral movement once tightened.
Rear Axle Sliders Installation
(CAUTION!!! TOO MUCH TORQUE IN THE AXLE SLIDERS ROD WILL
CAUSE THE THREADS TO STRIP AND A NEW ROD WILL NEED TO BE
PURCHASED).
Items needed:
- 5mm Hex/Allen wrench (2)
- Blue thread locker (Loctite)
- Red thread locker (Loctite)
1. Apply a small amount of red thread locker to the screw threads of the longest
screw (60mm) that was supplied with the axle sliders set.
2. Attach the slider with the extended base (long slider) to the aluminum axle slider rod.
3. After tightening, insert rod/slider assembly into the right side of the axle.
4. Apply blue thread locker to the shorter screw in the set (40mm, the only one left)
and install the slider with the recessed base onto the left side. It may take a second
to find the rod in the axle and get the threads started but just be sure the screw
starts straight.
5. Hold the screw on the opposite side with another 5mm hex wrench and tighten
the left side with a small amount of torque. CAUTION!!!! The threads in the rod
will strip if too much force is applied to the screws when tightening.
The rear axle slider assembly should not have any lateral movement once tightened.
Swingarm Spools Installation
Items needed:
- 5mm Hex/Allen wrench
- Blue thread locker (Loctite)
1. Apply a small amount of thread locker to the screw threads and thread
screw into the mounting point near the rear axle on the lower side of the
swingarm.
2. Tighten with a small amount of torque using the 5mm hex wrench.
3. Repeat steps 1-2 on opposite side.